CX LowPro for Interior and Exterior Applications
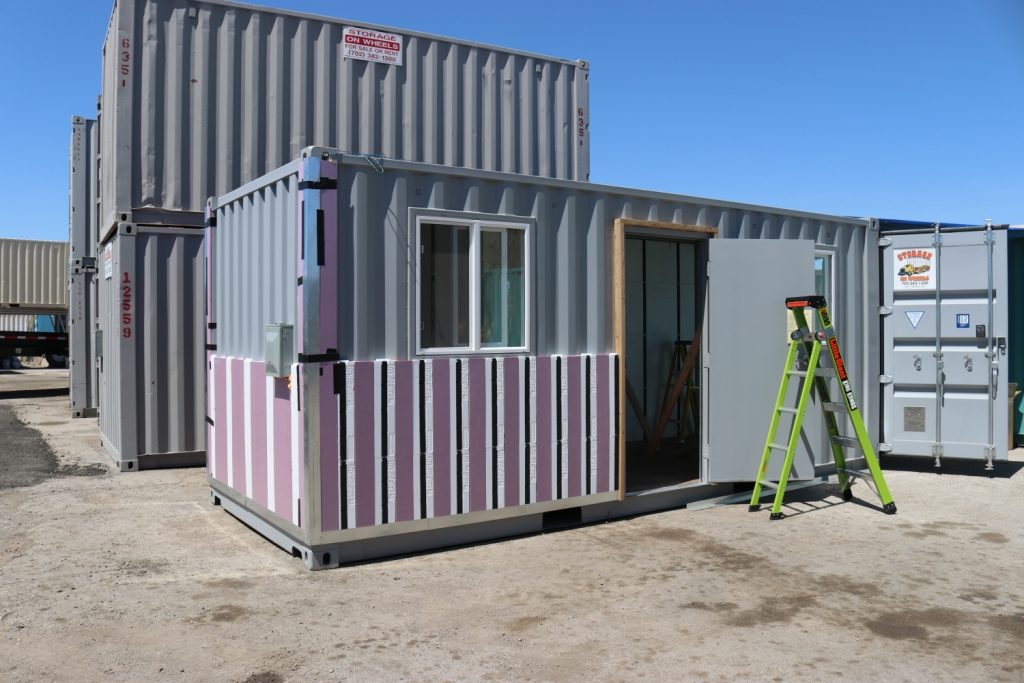
CX LowPro a superior engineered solution for insulating containers. The CX-LP studs is ideally suited for intermodal container conversions. CX-LP is a no compromise, one step insulated stud that takes the complexity out of shipping containers retrofits. The adhesively applied CX-LP eliminates the hundreds of holes associated with shipping container or sea can modifications. Insulating a shipping container is a balancing act between space, comfort, energy efficiency, and humidity control, LowPro gives you that control.
LowPro insulated studs are hybrid engineered solution for insulating containers. It is versatile and can be used for interior or exterior applications. The CX-LP studs are ideally suited for intermodal container conversions and is suited for industrial applications where thin wall insulation and framing is the primary concern. If you are (not planning to embed) electric services like wiring in the wall, or if you are planning surface mounted conduit.
Why you would use LowPro Insulated Studs
LowPro insulated studs are hybrid engineered solution for insulating containers. It is versatile and can be used for interior or exterior applications. One of the many benefits to the stud, it is smaller than the panels making them easier to handle and modify to accommodate working around dings and dents of older containers. The insulated stud eliminates framing cold spots and fastener condensation when insulating a container.
The CX-LP is a hybrid method for insulating a shipping container addresses limited rural delivery and overseas freight charges. CX-LP insulated stud method utilizes foam insulation that you source locally. Flat foam board purchased locally reduce bulk shipment costs.
CX LowPro Insulated Studs Exterior application
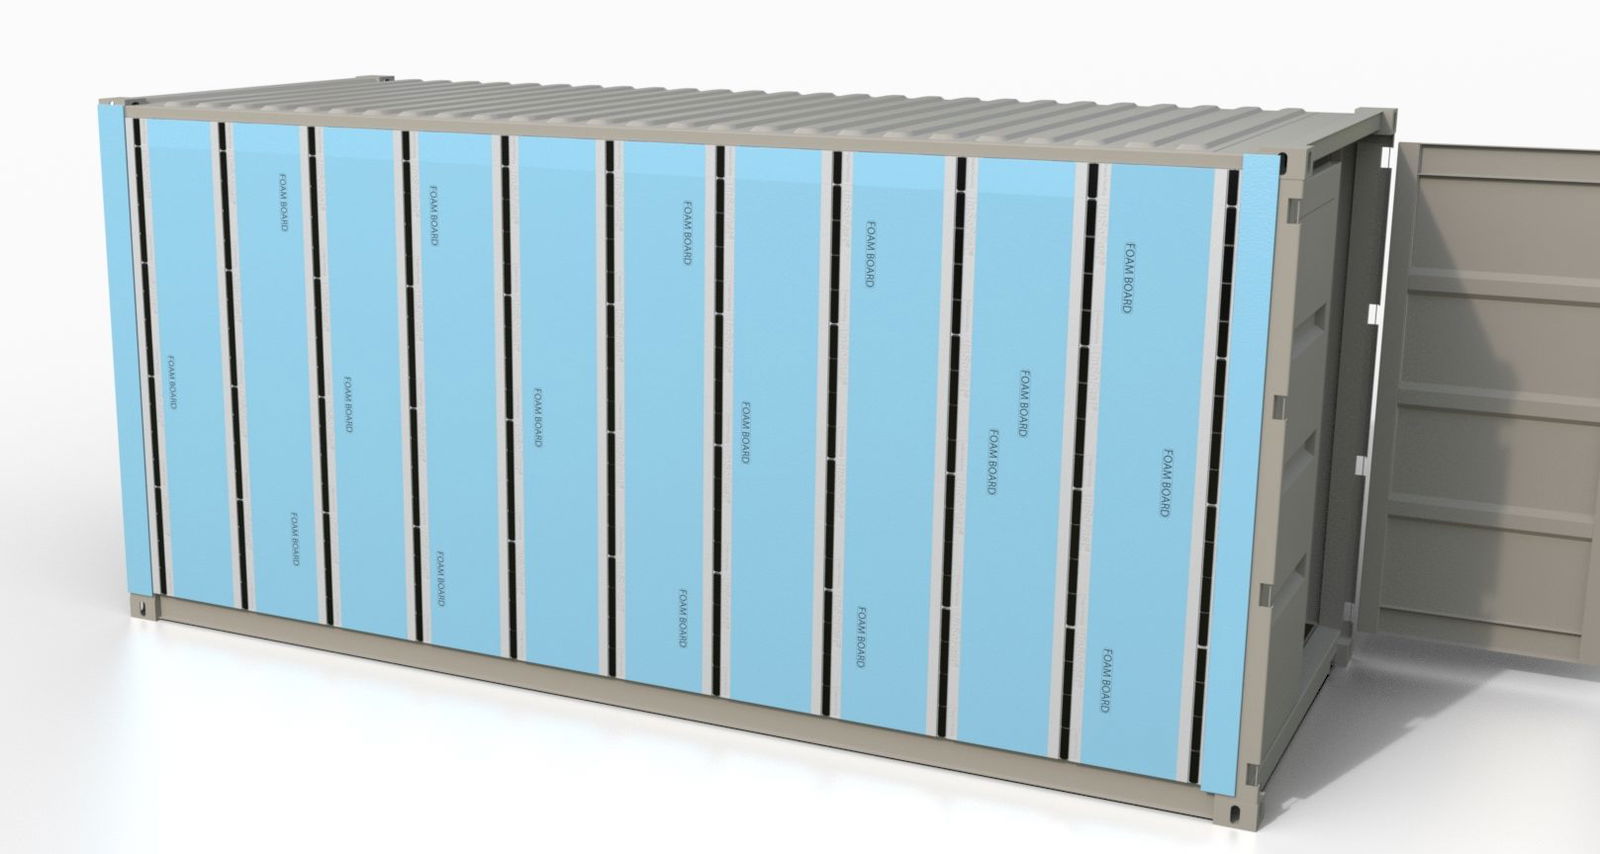
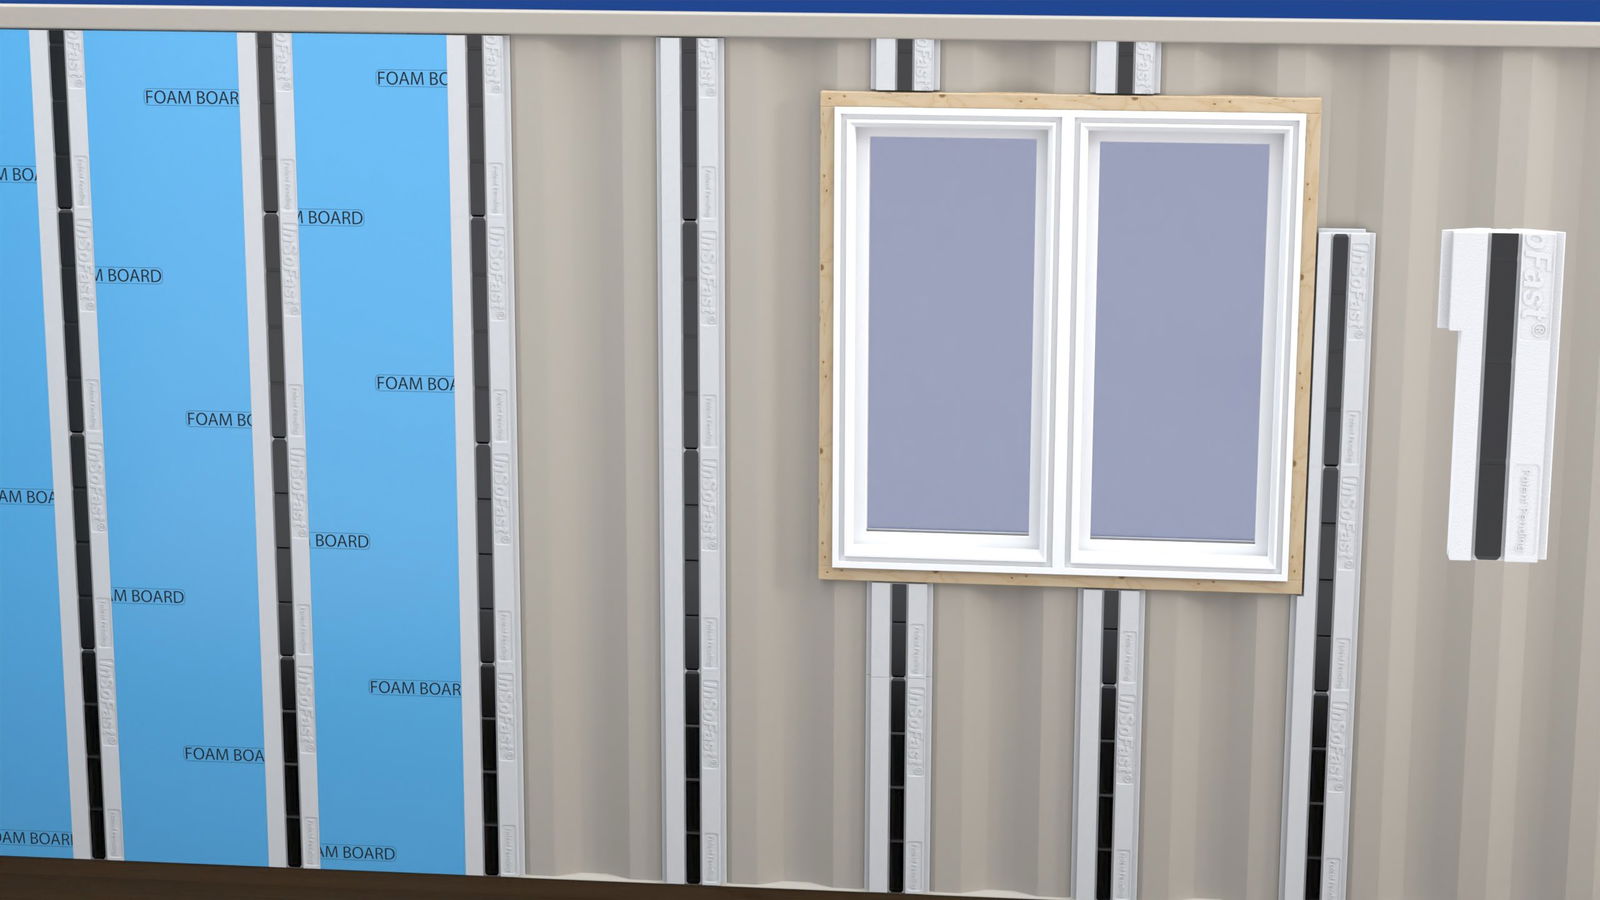
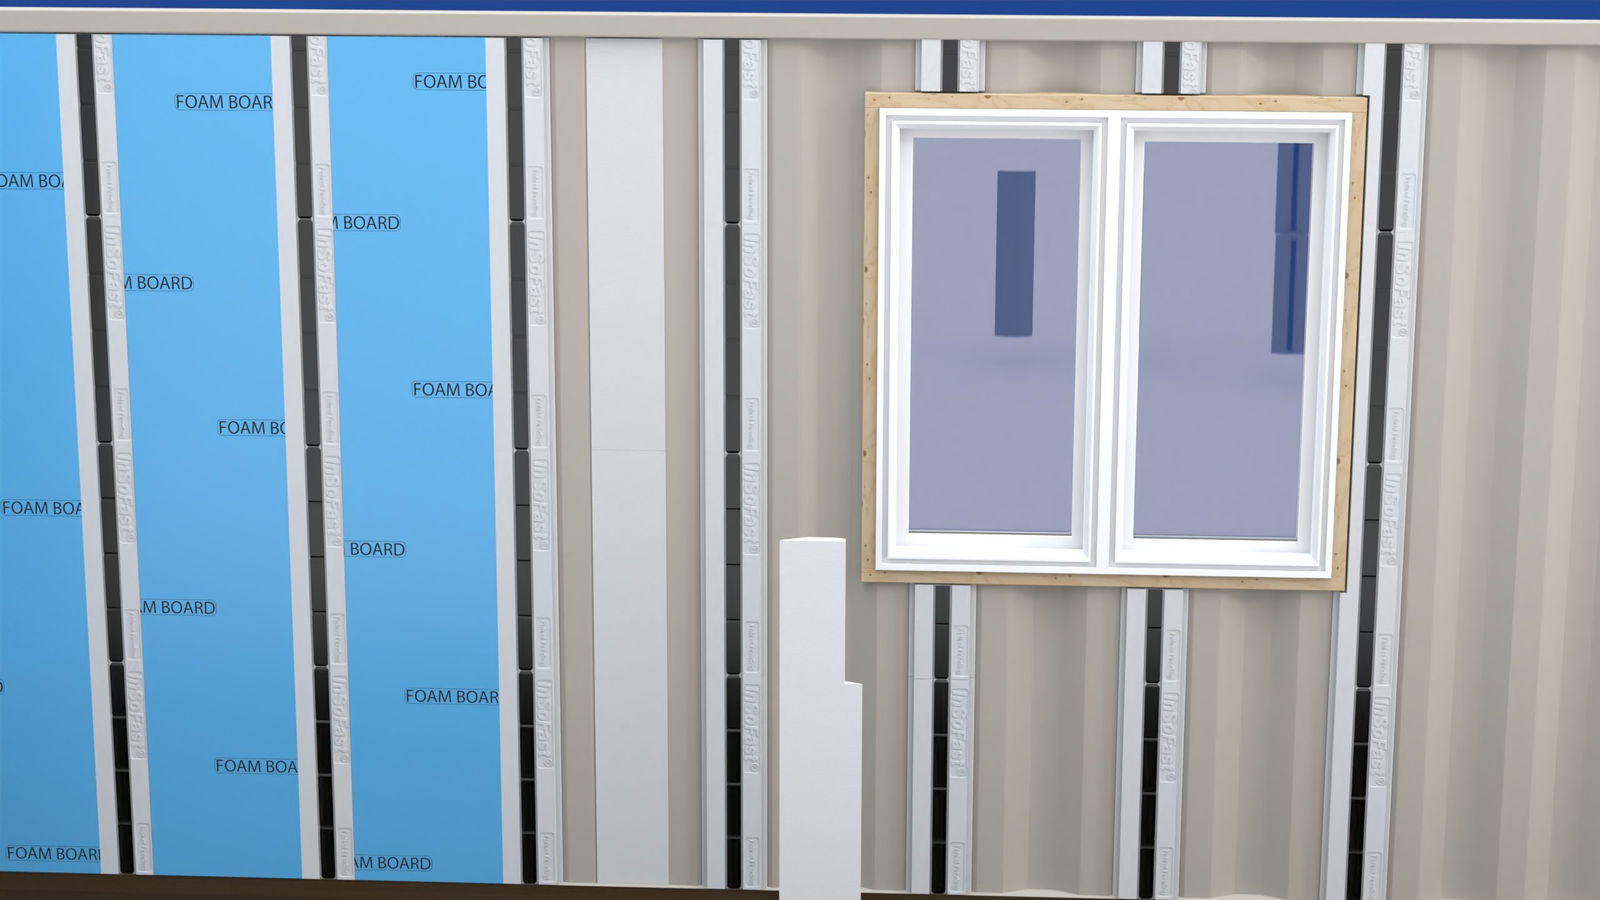
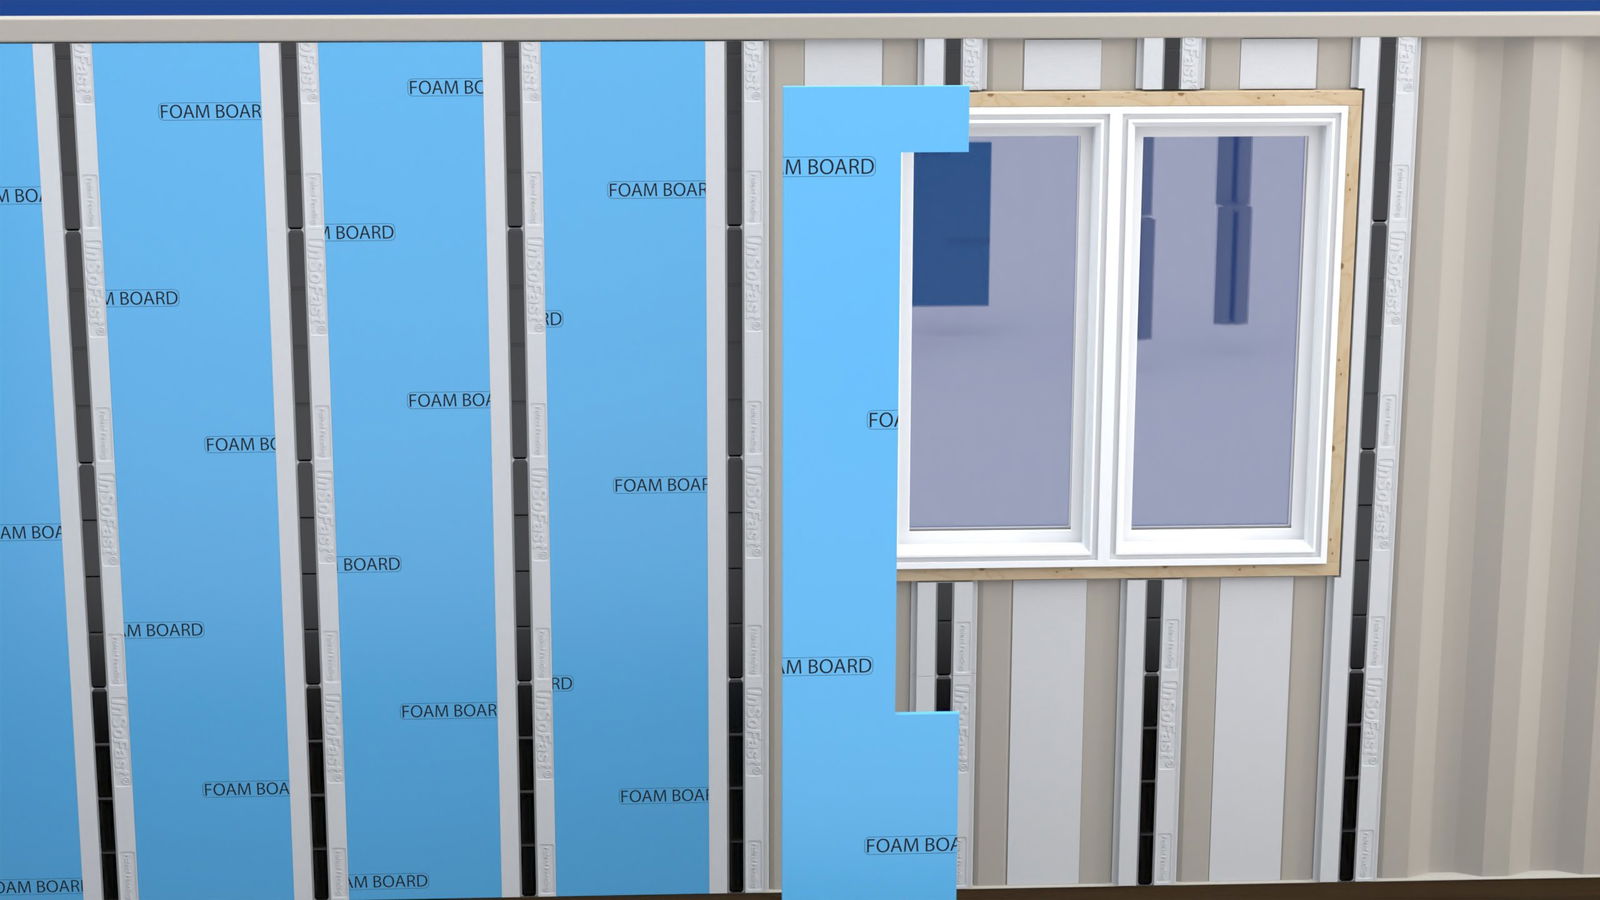
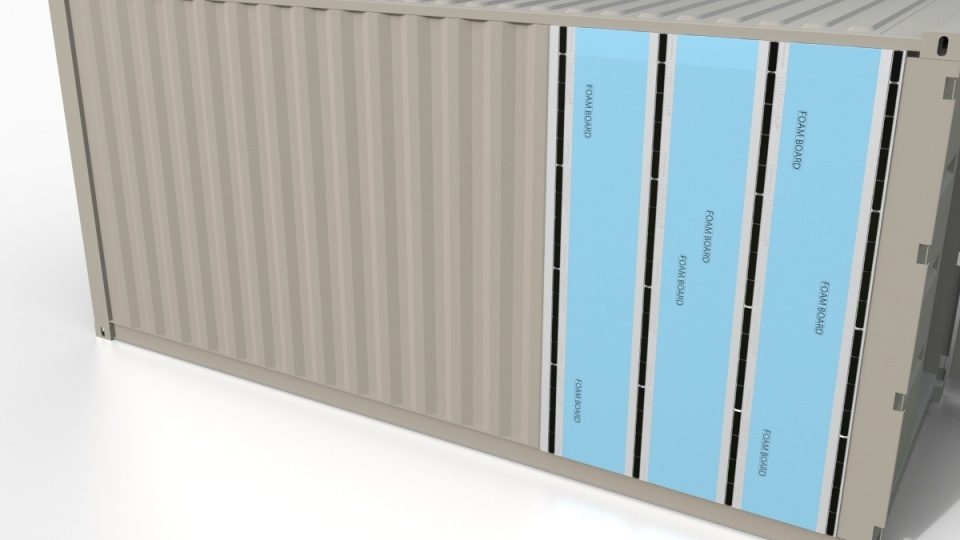
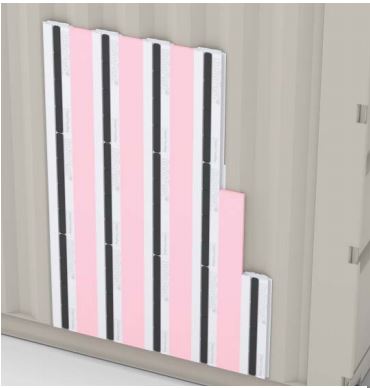
LowPro Sidewall Application
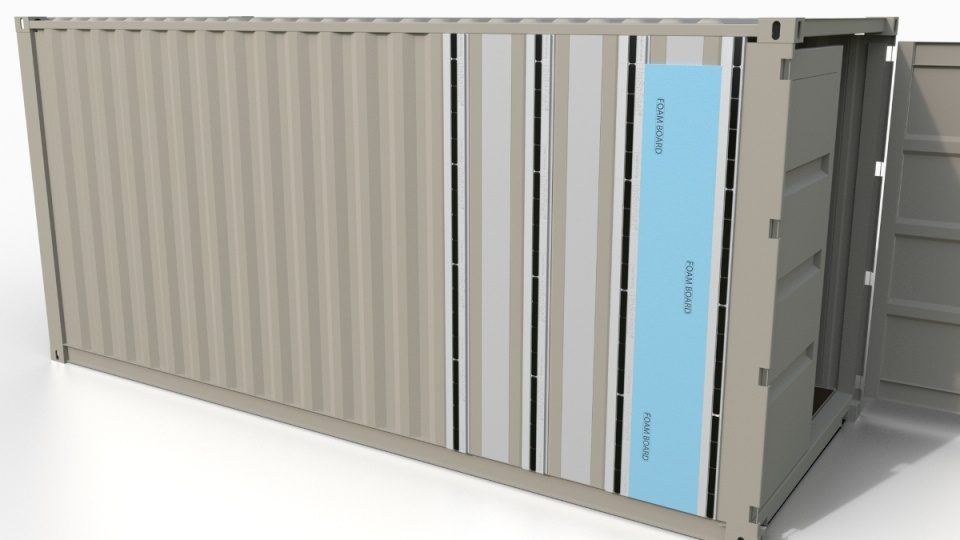
The long sidewalls of the shipping container using the LowPro Stud is a three step process and is insulated with Sidewall Inserts and locally sourced 3/4″ thick sheet foam insulation.The adhesive applied CX-LP eliminates the hundreds of holes associated with shipping container or sea can modifications. The CX LowPro stud is part of a assembly to work with the Sidewalls Inserts. The corrugation infills are typically placed on either 11 – 22 inches on center in an alternating pattern with the (SWI) side wall inserts. The CX-LP insulated infill framing is ideally suited for container conversions in commercial, residential, industrial, interior or exterior applications where thin wall insulation and framing is the primary concern. LowPro used in this configuration with 1/2″ thick drywall only 1 1/4″ of interior space is lost.
LowPro Endwall Application
The Endwalls of the shipping container using the LowPro Stud is a three step process and is insulated with endwall Inserts and locally sourced 3/4″ thick sheet foam insulation.
The adhesive applied CX-LPEW eliminates the hundreds of holes associated with shipping container or sea can modifications. The LP EW stud is part of a assembly to work with the Endwall Bundle. The corrugation infills are typically placed on alternating pattern with the (EWI) side wall inserts. The LP-EW insulated infill framing is ideally suited for container conversions in commercial, residential, industrial, interior or exterior applications where thin wall insulation and framing is the primary concern. LP-EW used in this configuration with 1/2″ thick siding, very little exterior space is lost.
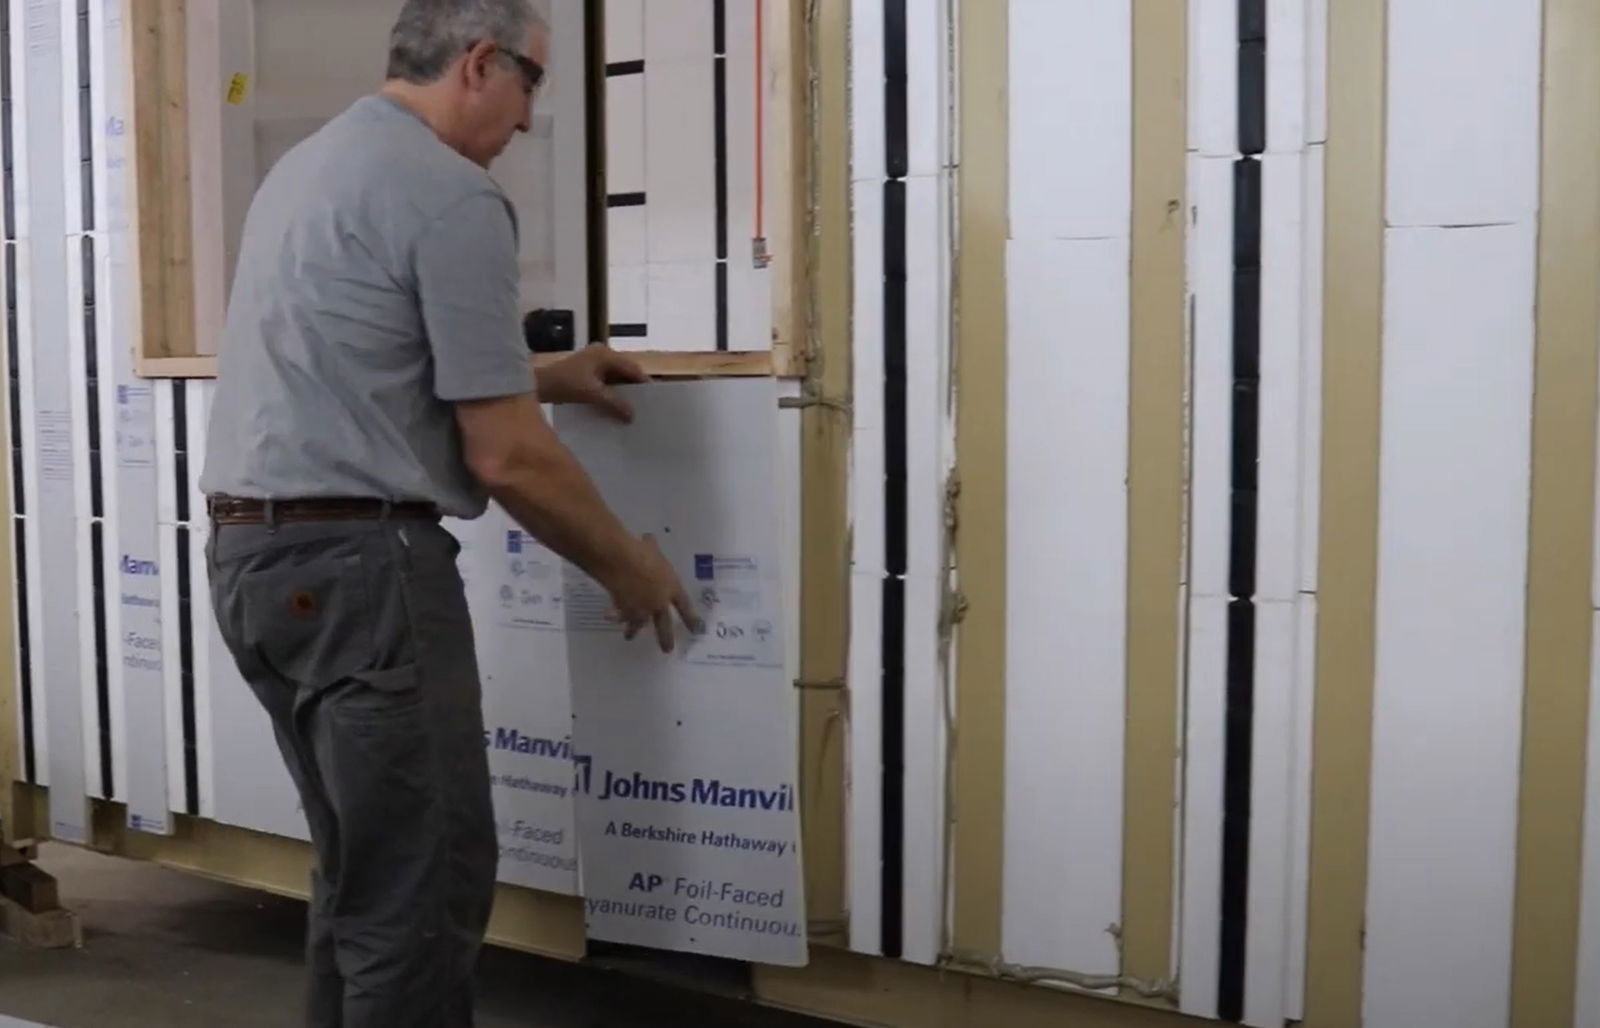
Cut material to fit

It is highly recommended that the 3 components be install at the same time. Once install tamp the panels with a straight edge like a 2×4 lumber to make sure that the wall is level and flat.
CX LowPro Insulated Studs Interior application
CX LowPro Insulated Studs for the Side Walls
The CX LowPro is a versatile thin profile insulation a for shipping container construction. Combining all the best features of continuous insulation and framing it is ready to finish. This method eliminates parts, pieces and guess work.
InSoFast can pack a shipping container with enough CX-LP studs to do 40-50 container conversions reducing the cost of freight. The CX-LP concentrates the value by reducing the air shipped by 10-fold.
One box of the CX-LP (46 Insulated studs) will do 92 lineal feet of framing. One 20′ standard shipping container side wall would need 44 pcs, of the CX LowPros insulated studs and 20 pcs. of the Sidewall Inserts to do one long side wall.
- One box of Side Wall Inserts has 30 pcs. that are 48 inches long or will cover 112 Lineal feet of corrugation in-fill.
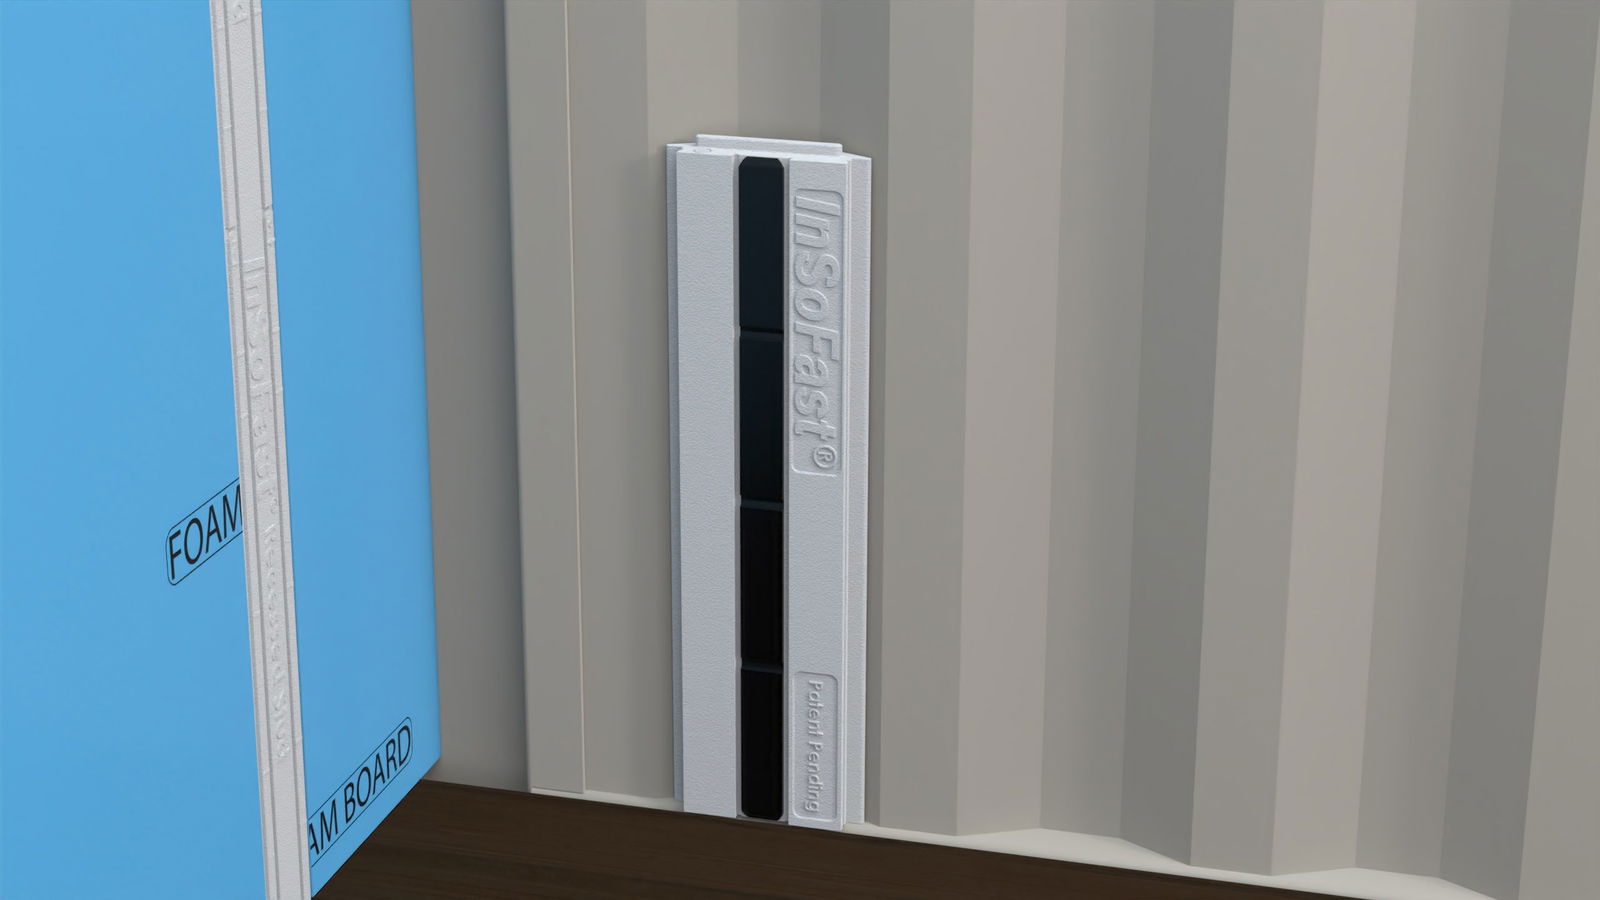
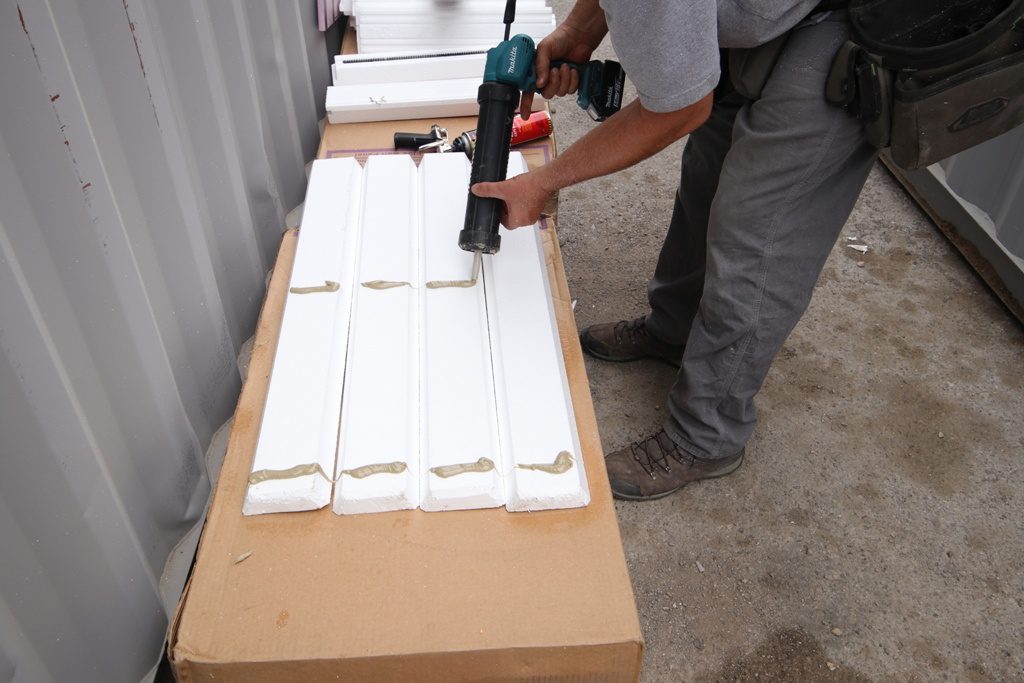
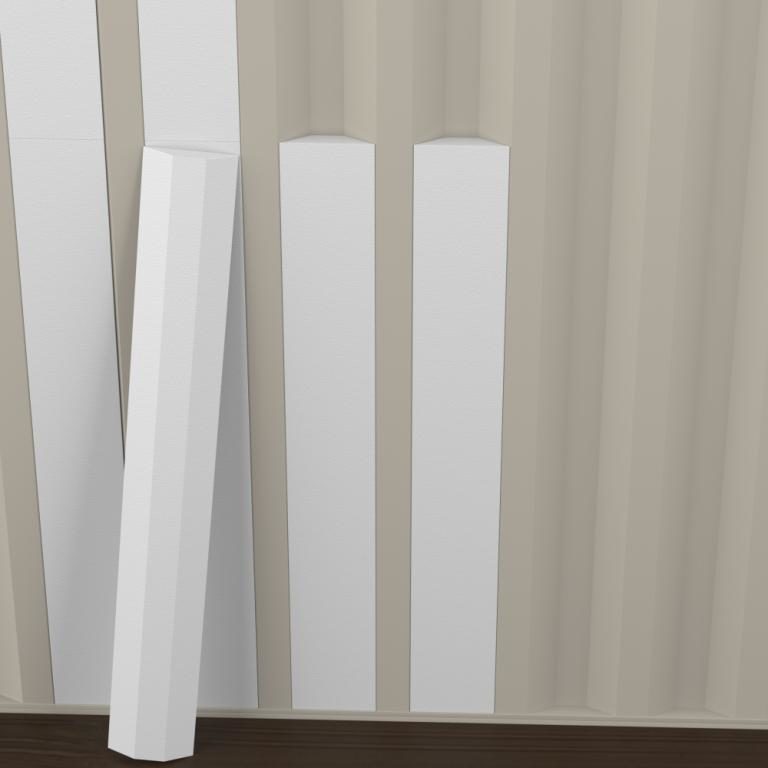
Apply a 3/8″ bead of Loctite PL Premium 3x construction adhesive horizontally across the top then directly over the ribbed surface of the backside of the stud to form “T” pattern.
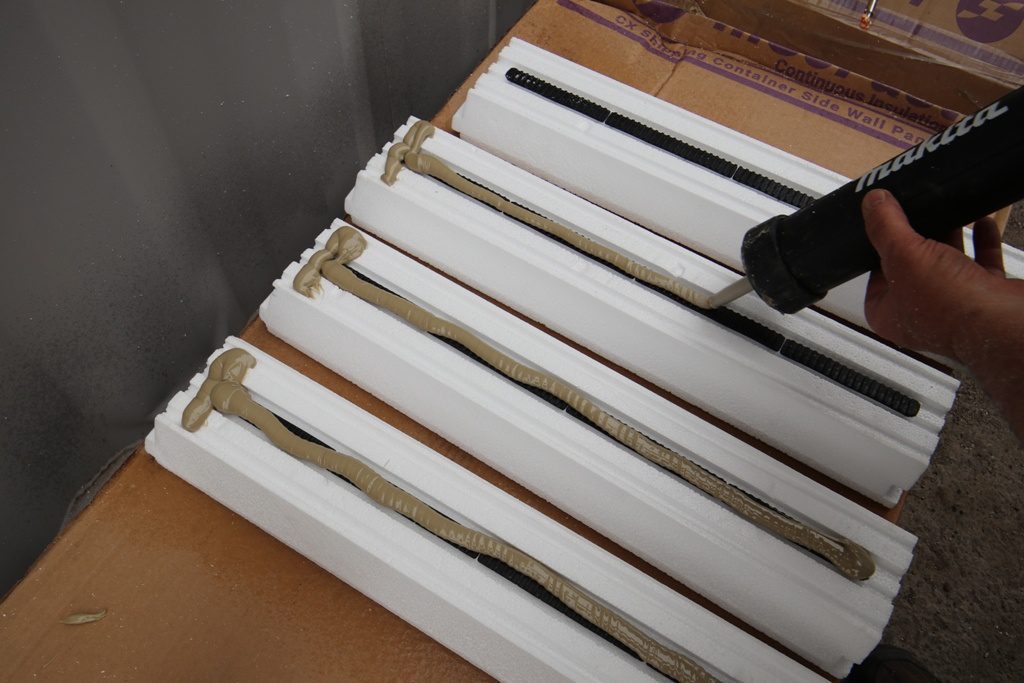
The LowPro studs can be cut to fit using regular wood working tools or razor knives. Remember to cut and modify the studs before you glue them.
LowPro Endwall Insulated Stud
The CX LowPro is a versatile thin profile insulation stud for insulating the end wall of a shipping container construction. Combining the best features of continuous insulation and framing the LowPro Endwall is ready to finish. The LowPro method eliminates parts, pieces and guess work.
LP-EW: LowPro End Wall bundle is part of a assembly that has material to finish the end wall of a 9′ high cube or 8′ standard shipping container. The LP-EW studs are placed 10 inches on center alternating with the end wall inserts. The LP-EW studs are ideally suited for container conversions for commercial, residential, industrial, interior or exterior applications where thin wall insulation and framing is the primary concern. Refer to the container diagram to determine the proper fit is very important.
- *This LP-EW bundle is a 3 part assembly designed to work on the end wall of a container. Sheet infill insulation supplied by others.
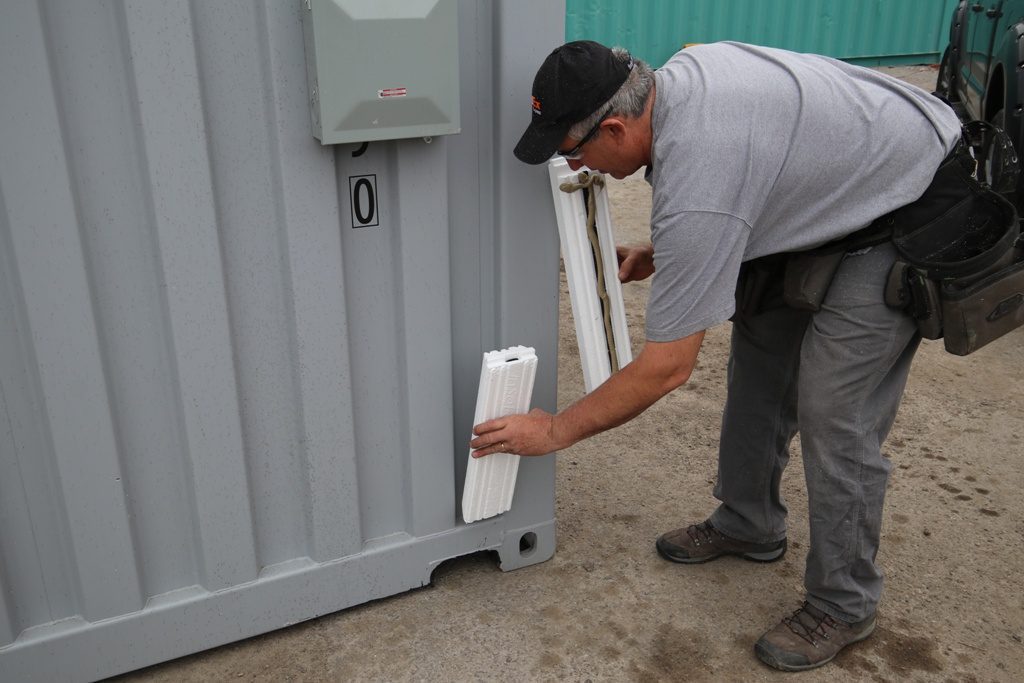
Install the sidewall inserts

Place a bead of adhesive in an “S” pattern down the center of the backside of the sidewall or endwall insert. Or the adhesive can be applied across the width of the insert to secure the endwall of the shipping container. Set the inserts into the lower half of the sidewall corrugations. Continue to cut, fit and glue all the insert onto the sidewall corrugations. Spray foam and seal all your work.

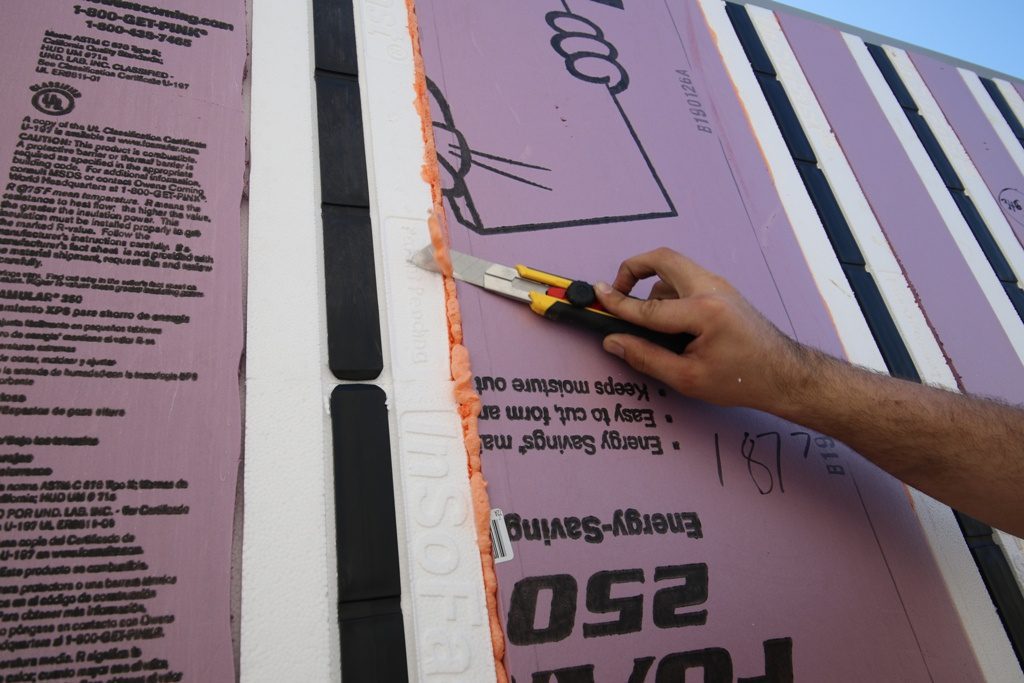
Install the the locally sourced 3/4″ sheet insulation
When the LowPro Studs are installed in an alternating pattern of 22″ on center, the sheet foam is cut from a 48″ x 96″ (3/4″) into 16″ wide panels.
Insert 16” sheet foam between the LowPro Inserts.
Use 5” wide sheet foam when LowPro is installed in every corrugation
Optionally when the LowPro Studs are placed in an alternating pattern of 11″ on center, the sheet foam is cut from a 48″ x 96″ (3/4″) into 5″ wide panels.
It is highly recommended that the 3 components be install at the same time. Once install tamp the panels with a straight edge like a 2×4 lumber to make sure that the wall is level and flat.
Install infill insulation in the corner
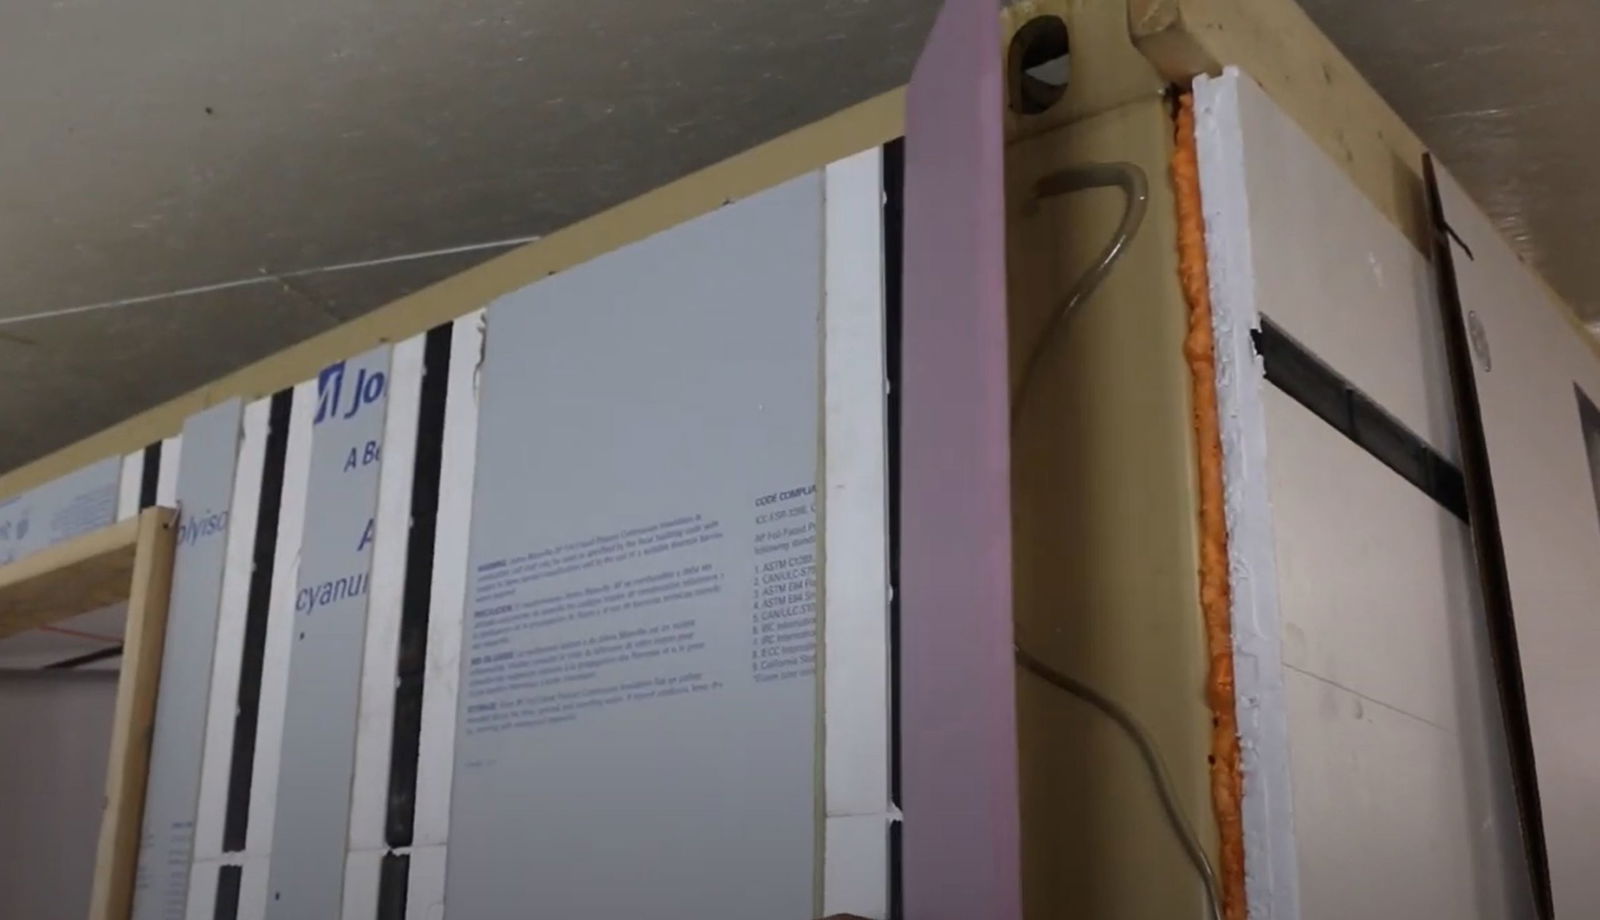
The outside corner can be filled with 1/2″ thick board stock insulation from a local lumber supplier.
Finishing the insulation and framing
Trim away any excess spray foam and the wall is ready for finishes.
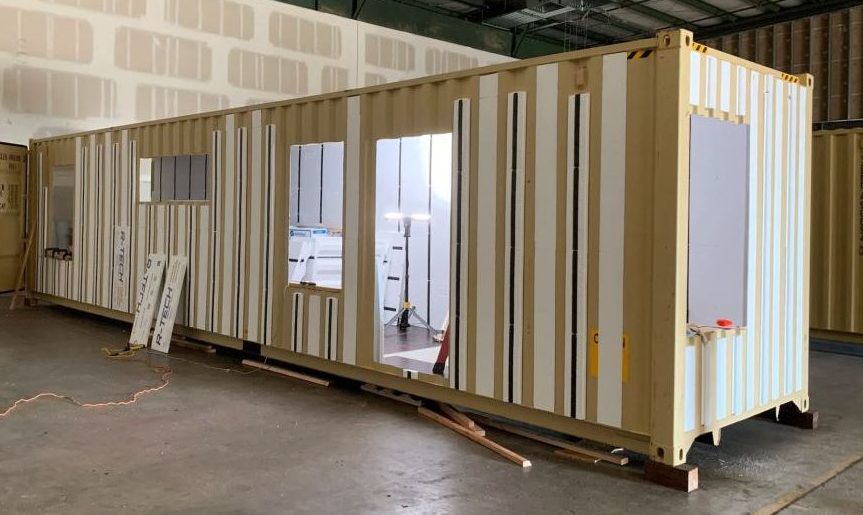
The LowPro’s versatility of traditional framing without the energy penalty of steel or wood studs. In this example the LowPro studs provide extra attachment around a window opening.
Products Required

| CX-LP LowPro Insulated Stud | Side Wall InSerts | |
| CX LowPro-Side Wall Architectural Details | dwgdxfpdf | Dimensioned to fit |
| Dimensions | 7 1/2in × 24in × 2in | 48in x 7 3/4in x 1 1/4 in |
| Coverage | 2.5 sq-ft | 2.5 sq-ft |
| R-Value ASTM C518 | R-8.5 | R-5.3 |
| Closed-Cell, injection-molded EPS | ASTM C578 Type II | ASTM C578 Type II |
| Canadian Standards | CAN/ULC S701 Type 2 | CAN/ULC S701 Type 2 |
| Foam Density | 1.35 lbs per cubic foot | 1.35 lbs per cubic foot |
| Polypropylene Studs | Surface | N/A |
| Ready for Finishes | √ | √ |
| Interior | √ | √ |
| Exterior | √ | √ |
- One box of the CX-LP 46 Insulated studs will do 92 lineal feet of framing.
- One 20′ container side wall would need 44 pcs, of CX LowPros insulated studs and 20 pcs. of the Side Wall Inserts to do one side.
- One box of Side Wall Inserts has 30 pcs. that are 48 inches long or will cover 112 Lineal feet of corrugation in-fill.
- One box of the CX-LP 46 Insulated studs will do 92 lineal feet of framing.
The high-strength co-polymer plastic studs on 11 or 22-inches centers provide a positive attachment stud for finishing the container. The ribbed dovetails surface provides for adhesive applications against the metal surfaces.
Panels you would need for a complete insulated LowPro Container
| Complete Interior Insulation for a Container; | 20′ Standard | 20′ High Cube | 40′ Standard | 40′ High Cube |
| LowPro Insulated Studs/Inserts Sidewall | Sidewall | Sidewall | Sidewall | Sidewall |
| CX-LP 46 LowPro Insulated Stud | 2 | 2 | 4 | 4 |
| CX-LP 15 LowPro Insulated Stud | 1 | 1 | 0 | 1 |
| Sidewall Inserts: | 2 | 2 | 4 | 4 |
| Box Total: | 5 | 5 | 8 | 9 |
| Endwall (Container) LowPro-Bundle | Endwall | Endwall | Endwall | Endwall |
| Endwall LowPro-Kit | 1 | 1 | 1 | 1 |
| Ceiling 2.0 Flat Panel-Bundle | Ceiling | Ceiling | Ceiling | Ceiling |
| 2.0 Flat Panel (UX) | 4 | 4 | 8 | 8 |
| Inserts: Ceilings | 1 | 1 | 2 | 2 |
| Box Total: | 5 | 5 | 10 | 10 |
| Door 2.5 Flat Panel-Bundle (2) Doors | Door | Door | Door | Door |
| 2.5 Flat Panel (EXe) | 2 | 2 | 2 | 2 |
| Floor 2.0 Flat Panel-Bundle | Floor | Floor | Floor | Floor |
| 2.0 Flat Panel (UX) | 4 | 4 | 8 | 9 |
| Total Box Count: | 17 | 17 | 29 | 31 |
| Foam Board Insulation by others: | 3/4″ x 4′ x 8′ | 3/4″ x 4′ x 8′ | 3/4″ x 4′ x 8′ | 3/4″ x 4′ x 8′ |
| Sidewall | 14.67 | 16.25 | 29.67 | 31.75 |
| Total 4×8 Panel Count | 15 | 17 | 30 | 32 |
Freight Dimensions Weight
We offer free curb side deliveries on all of our orders.
You may upgrade your delivery service for an additional charge. LIFT GATE SERVICE IS AN ADDITIONAL CHARGE. Please read through our shipping and purchasing policies, for more details before placing your order.
| Product Code | Number of Parts | Per Box Dimension | Cubic Feet Per Box | Weight Per Box | ||
| Length | Width | Height | ||||
| CX -LP46 | 46 pcs = 92 lnft | 14″ | 26″ | 44″ | 9.27 | 28 Lbs |
| CSW -Side Wall Inserts | 30 pcs 4′ = 120 lnft | 11″ | 25″ | 49″ | 7.80 | 12 Lbs |
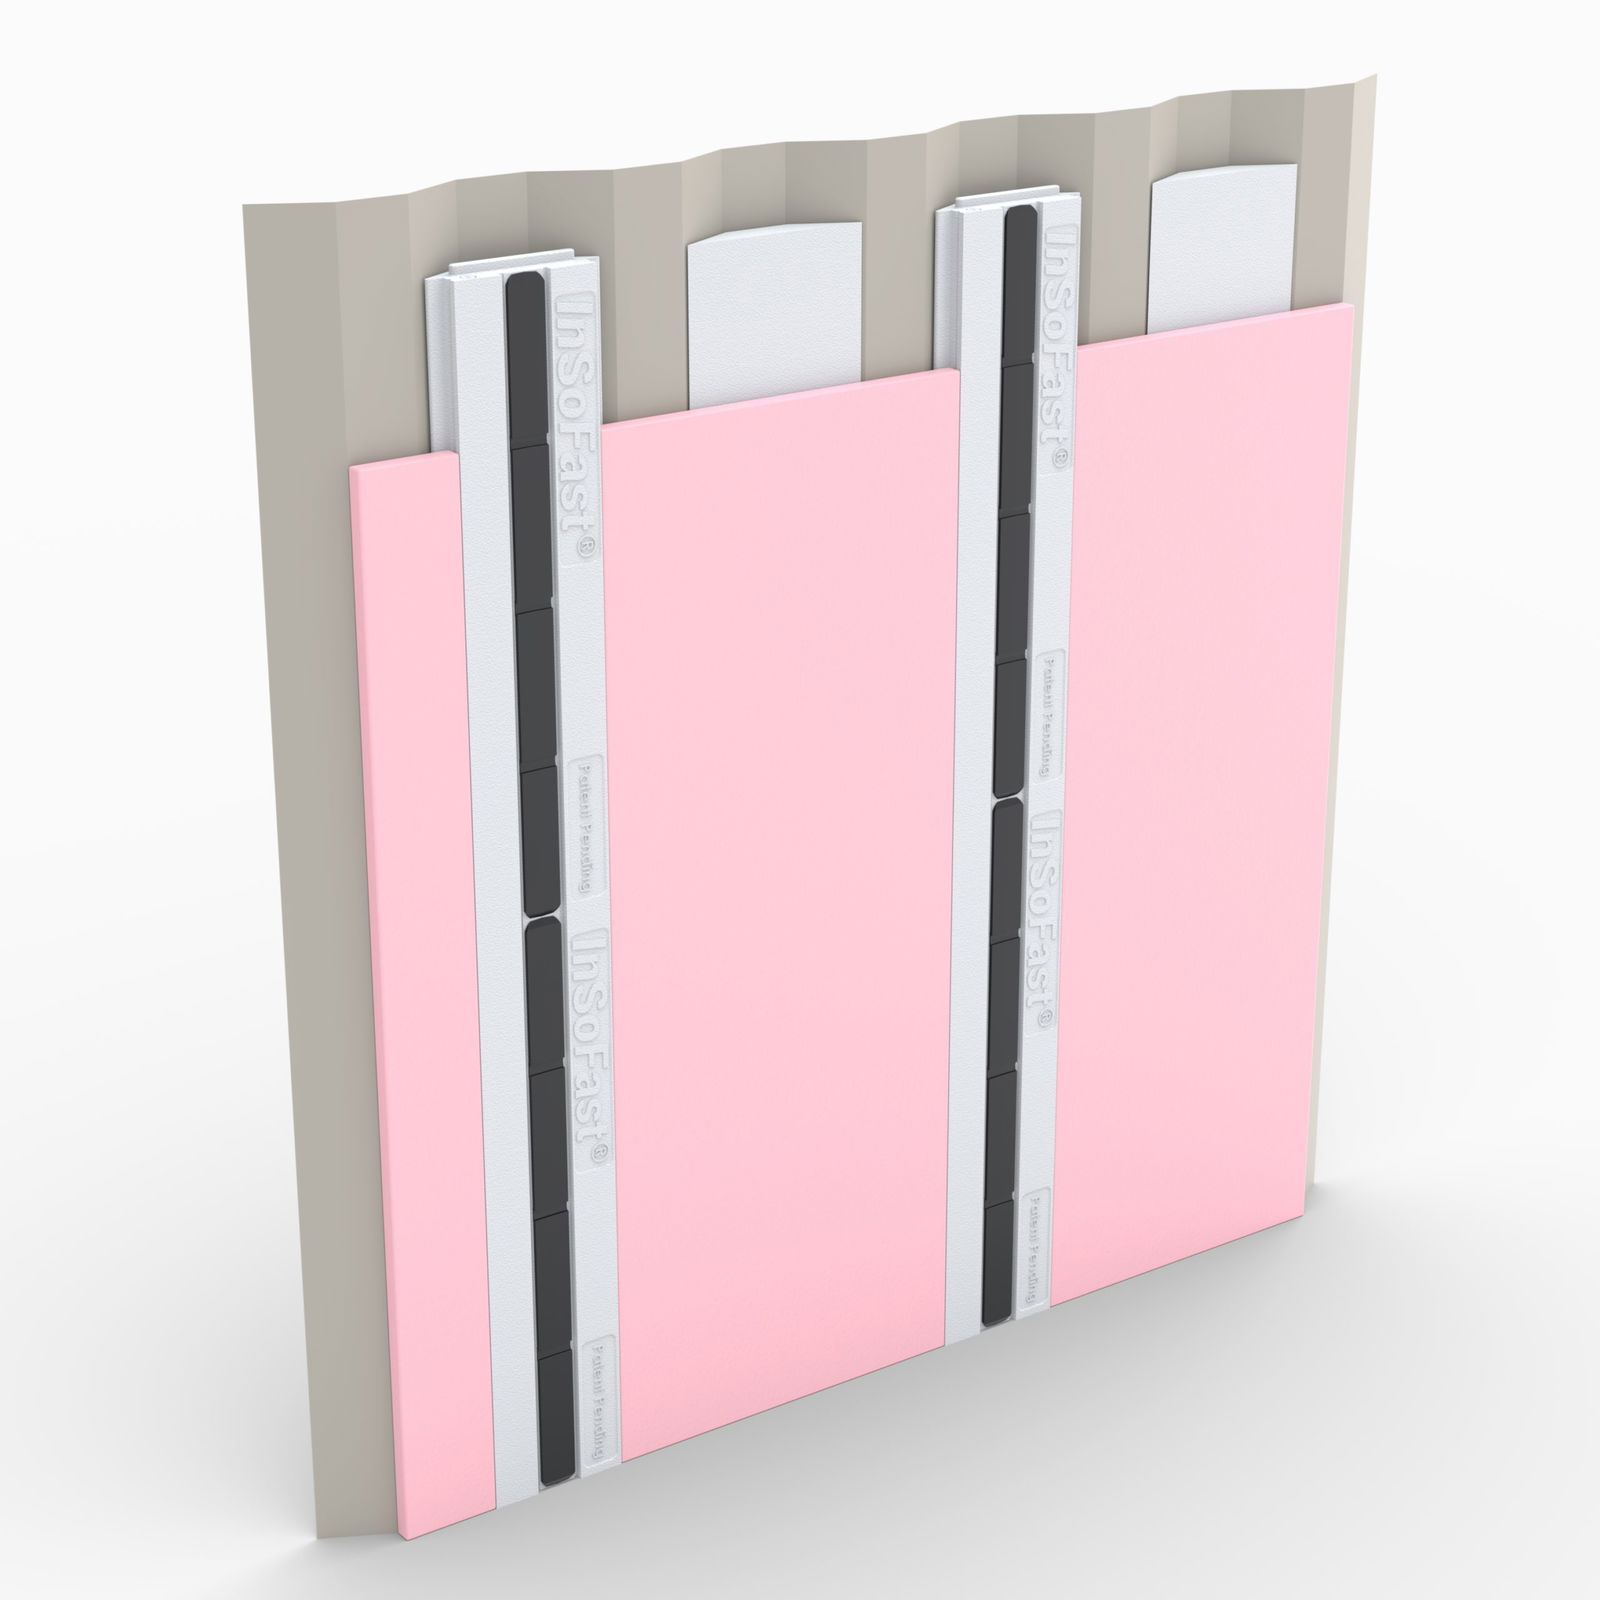
InSoFast Plus Method
Need a higher R-value? It’s easy to increase your R-Value while maintaining the engineered benefits of the continuous InSoFast panels.